2022. 10. 18. 21:51ㆍ모바일앱개발_flutter
중앙대학교 소프트웨어학과 이준우교수님의 모바일 앱개발 강의를 참고하여 포스팅하였습니다.

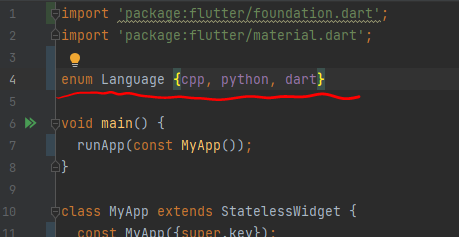
import 'package:flutter/foundation.dart';
import 'package:flutter/material.dart';

void main() {
  runApp(const MyApp());
}

class MyApp extends StatelessWidget {
  const MyApp({super.key});

  //This widget is the root of your application.
  @override
  Widget build(BuildContext context) {
    return MaterialApp(
      title: 'Flutter App',
      theme: ThemeData(
        primarySwatch: Colors.blueGrey,
      ),
      home: Container(),
    );
  }
}
오늘은 여기서부터 시작해볼거당
home에 MyHomePage 위젯을 연결해주고
MyHomePage를 stateful 위젯으로 만든다.
Scaffold 위젯도 추가해준다.


body에는 checkbox 위젯을 만들어볼거다

 body: Checkbox(
        value: _isChecked,
        onChanged: (value){
          setState((){
            _isChecked = value!;
            print('$_isChecked');
          });
        },
      ),
_isChecked = value!;
에서 !를 안붙이면 null check 에러가 난다.
!의 뜻은 변수를 할당할때 절대 null이 아니다 라고 표시하는 것이다.

체크되면 true
체크 풀면 false
위젯 이름을 Switch로 바꾸면
body: Switch(
        value: _isChecked,
        onChanged: (value){
          setState((){
            _isChecked = value!;
            print('$_isChecked');
          });
        },
      ),
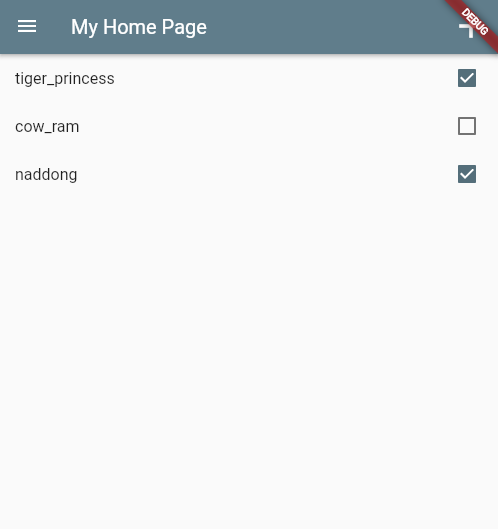
CheckboxListTile 위젯
 body: Column(
        children: [
          CheckboxListTile(
            title: Text('tiger_princess'),
            value: _isChecked,
            onChanged: (value){
              setState((){
                _isChecked = value!;
                print('$_isChecked');
              });
            },
          ),
          CheckboxListTile(
            title: Text('cow_ram'),
            value: _isChecked2,
            onChanged: (value){
              setState((){
                _isChecked2 = value!;
                print('$_isChecked2');
              });
            },
          ),
          CheckboxListTile(
            title: Text('naddong'),
            value: _isChecked3,
            onChanged: (value){
              setState((){
                _isChecked3 = value!;
                print('$_isChecked3');
              });
            },
          ),
        ],
      ),
SwitchListTile로도 할 수 있다.
body: Column(
        children: [
          SwitchListTile(
            title: Text('tiger_princess'),
            value: _isChecked,
            onChanged: (value){
              setState((){
                _isChecked = value!;
                print('$_isChecked');
              });
            },
          ),
          SwitchListTile(
            title: Text('cow_ram'),
            value: _isChecked2,
            onChanged: (value){
              setState((){
                _isChecked2 = value!;
                print('$_isChecked2');
              });
            },
          ),
          SwitchListTile(
            title: Text('naddong'),
            value: _isChecked3,
            onChanged: (value){
              setState((){
                _isChecked3 = value!;
                print('$_isChecked3');
              });
            },
          ),
        ],
      ),
checkbox와 switch는 모양만 다르다. 내부 구성은 똑같음!
radioListTile
- 옵션 하나

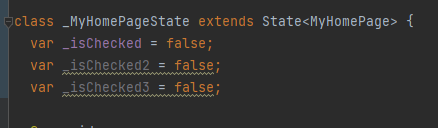
class _MyHomePageState extends State<MyHomePage> {
  Language _language = Language.cpp;
  var _isChecked = false;
  var _isChecked2 = false;
  var _isChecked3 = false;

  @override
  Widget build(BuildContext context) {
    return Scaffold(
      appBar: AppBar(
        title: const Text('My Home Page'),
        actions: [
          IconButton(
            icon: const Icon(Icons.add),
            onPressed: (){},
            iconSize: 40,
          ),
        ],
      ),
      body: Column(
        children: [
          RadioListTile(
            title: Text('C++'),
            value: Language.cpp,
            groupValue: _language,
            onChanged: (value){
              setState((){
                _language = value!;
              });
            }
          ),
          RadioListTile(
              title: Text('Python'),
              value: Language.python,
              groupValue: _language,
              onChanged: (value){
                setState((){
                  _language = value!;
                });
              }
          ),
          RadioListTile(
              title: Text('Dart'),
              value: Language.dart,
              groupValue: _language,
              onChanged: (value){
                setState((){
                  _language = value!;
                });
              }
          ),
        ],
      ),
      drawer: const Drawer(),
    );
  }
}
누를때마다 _language 변수에 담기는 값이 바뀌는 걸 확인해보자.


dropdownButton을 만들어보자.
final _valueList = List.generate(10, (i) => 'Student $i');
var _selectedValue = 'Student 0'; //dropdownButton을 누름에 따라 바뀌는 변수
class _MyHomePageState extends State<MyHomePage> {
final _valueList = List.generate(10, (i) => 'Student $i');
var _selectedValue = 'Student 0'; //dropdownButton을 누름에 따라 바뀌는 변수
@override
Widget build(BuildContext context) {
return Scaffold(
appBar: AppBar(
title: const Text('My Home Page'),
actions: [
IconButton(
icon: const Icon(Icons.add),
onPressed: (){},
iconSize: 40,
),
],
),
body: DropdownButton(
value: _selectedValue,
//배열 이용
items: _valueList.map(
(value) {
return DropdownMenuItem(
value: value,
child: Text(value)
);
}
).toList(),
onChanged: (value){
_selectedValue = value!;
print(_selectedValue);
},
),
drawer: const Drawer(),
);
}
}

Center 위젯으로 가운데다가 놓는다.

body: Center(
child: TextField(),
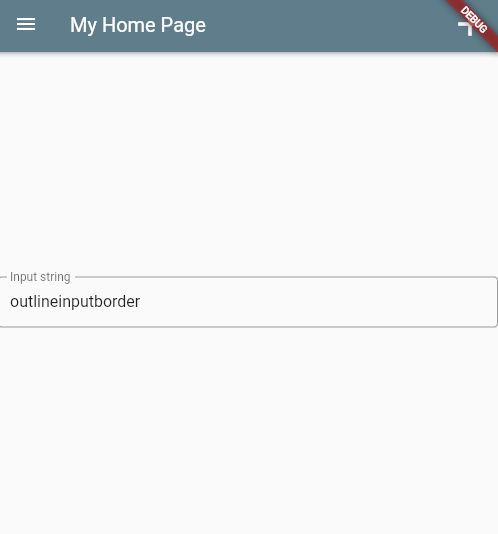
),TextField 위젯

return Scaffold(
      appBar: AppBar(
        title: const Text('My Home Page'),
        actions: [
          IconButton(
            icon: const Icon(Icons.add),
            onPressed: (){},
            iconSize: 40,
          ),
        ],
      ),
      body: Center(
        child: TextField(
          decoration: InputDecoration(
            labelText: 'Input string',
          ),
        ),
      ),
      drawer: const Drawer(),
    );
border: OutlineInputBorder(),body: const Center(
child: TextField(
decoration: InputDecoration(
border: OutlineInputBorder(),
labelText: 'Input string',
),
),
),


const 때문에 에러나는것이므로 Center앞에 const 제거
class _MyHomePageState extends State<MyHomePage> {
  final _myController = TextEditingController();

  void dispose() {
    _myController.dispose();
    super.dispose();
  }

  @override
  Widget build(BuildContext context) {
    return Scaffold(
      appBar: AppBar(
        title: const Text('My Home Page'),
        actions: [
          IconButton(
            icon: const Icon(Icons.add),
            onPressed: (){},
            iconSize: 40,
          ),
        ],
      ),
      body: Center(
        child: TextField(
          decoration: InputDecoration(
            border: OutlineInputBorder(),
            labelText: 'Input string',
          ),
          controller: _myController,
        ),
      ),
      drawer: const Drawer(),
    );
  }
}
import 'package:flutter/foundation.dart';
import 'package:flutter/material.dart';

void main() {
  runApp(const MyApp());
}

class MyApp extends StatelessWidget {
  const MyApp({super.key});

  // This widget is the root of your application.
  @override
  Widget build(BuildContext context) {
    return MaterialApp(
      title: 'Flutter App',
      theme: ThemeData(
        primarySwatch: Colors.purple,
      ),
      home: const MyHomePage(),
    );
  }
}

class MyHomePage extends StatefulWidget {
  const MyHomePage({Key? key}) : super(key: key);

  @override
  State<MyHomePage> createState() => _MyHomePageState();
}

class _MyHomePageState extends State<MyHomePage> {
  final _myController = TextEditingController();

  @override
  void dispose() {
    _myController.dispose();
    super.dispose();
  }

  @override
  Widget build(BuildContext context) {
    return Scaffold(
        appBar: AppBar(
          title: const Text('My Home Page'),
          actions: [
            IconButton(
              icon: const Icon(Icons.add),
              onPressed: (){},
            ),
          ],
        ),
        body: Padding(
          padding: const EdgeInsets.all(16.0),
          child: Center(
            child: Column(
              children: [
                TextField(
                  decoration: const InputDecoration(
                      border: OutlineInputBorder(),
                      labelText: 'Input string'
                  ),
                  controller: _myController,
                ),
                const SizedBox(
                  height: 30,
                ),
                Text(_myController.text,
                  style: const TextStyle(
                    fontSize: 20,
                  ),
                ),
                const SizedBox(
                  height: 30,
                ),
                ElevatedButton(
                  child: const Text('Enter'),
                  onPressed: (){
                    setState(() {});
                  },
                ),
              ],
            ),
          ),
        )
    );
  }
}


controller는 내가 textfield에 입력한 메세지를 받는다.
버튼을 누르기 전까지는 _myController가 받은 text가 나타나지 않는다.
버튼을 누르고 나서 setState() 함수가 실행되기 때문이다.
setState() 함수가 실행되야 _myController.text가 update된다.
 Widget build(BuildContext context) {
    return Scaffold(
        appBar: AppBar(
          title: const Text('My Home Page'),
          actions: [
            IconButton(
              icon: const Icon(Icons.add),
              onPressed: (){},
            ),
          ],
        ),
        body: Padding(
          padding: const EdgeInsets.all(16.0),
          child: Center(
            child: Column(
              children: [
                TextField(
                  decoration: const InputDecoration(
                      border: OutlineInputBorder(),
                      labelText: 'Height'
                  ),
                  controller: _myController,
                ),
                const SizedBox(
                  height: 30,
                ),
                TextField(
                  decoration: const InputDecoration(
                      border: OutlineInputBorder(),
                      labelText: 'Weight'
                  ),
                  controller: _myController,
                ),
                const SizedBox(
                  height: 30,
                ),
                Text(_myController.text,
                  style: const TextStyle(
                    fontSize: 20,
                  ),
                ),
                const SizedBox(
                  height: 30,
                ),
                ElevatedButton(
                  child: const Text('Enter'),
                  onPressed: (){
                    setState(() {});
                  },
                ),
              ],
            ),
          ),
        )
    );
  }
}


각각의 TextField별로 controller를 지정해줘야한다.
_heightController와 _weightController를 만들어보도록 하겠다.

Dispose():
관리되지 않는 리소스의 확보, 해제 또는 다시 설정과 관련된 애플리케이션 정의 작업을 수행합니다.
컨트롤러 객체가 제거 될 때 변수에 할당 된 메모리를 해제하기 위해

setState() 안에도 작업해주자.
setState(() {
  var height_value = double.parse(_heightController.text.trim());
});
입력받은 string을 trim() 해준 뒤, double형으로 변환

import 'package:flutter/foundation.dart';
import 'package:flutter/material.dart';

void main() {
  runApp(const MyApp());
}

class MyApp extends StatelessWidget {
  const MyApp({super.key});

  // This widget is the root of your application.
  @override
  Widget build(BuildContext context) {
    return MaterialApp(
      title: 'Flutter App',
      theme: ThemeData(
        primarySwatch: Colors.purple,
      ),
      home: const MyHomePage(),
    );
  }
}

class MyHomePage extends StatefulWidget {
  const MyHomePage({Key? key}) : super(key: key);

  @override
  State<MyHomePage> createState() => _MyHomePageState();
}

class _MyHomePageState extends State<MyHomePage> {
  final _heightController = TextEditingController();
  final _weightController = TextEditingController();
  String _obstate = 'Normal';

  @override
  void dispose() {
    _heightController.dispose();
    _weightController.dispose();
    super.dispose();
  }

  @override
  Widget build(BuildContext context) {
    return Scaffold(
        appBar: AppBar(
          title: const Text('My Home Page'),
          actions: [
            IconButton(
              icon: const Icon(Icons.add),
              onPressed: (){},
            ),
          ],
        ),
        body: Padding(
          padding: const EdgeInsets.all(16.0),
          child: Center(
            child: Column(
              children: [
                TextField(
                  decoration: const InputDecoration(
                      border: OutlineInputBorder(),
                      labelText: 'Height'
                  ),
                  controller: _heightController,
                  keyboardType: TextInputType.number,
                ),
                const SizedBox(
                  height: 30,
                ),
                TextField(
                  decoration: const InputDecoration(
                      border: OutlineInputBorder(),
                      labelText: 'Weight'
                  ),
                  controller: _weightController,
                  keyboardType: TextInputType.number,
                ),
                const SizedBox(
                  height: 30,
                ),
                Text(_obstate,
                  style: const TextStyle(
                    fontSize: 20,
                  ),
                ),
                const SizedBox(
                  height: 30,
                ),
                ElevatedButton(
                  child: const Text('Enter'),
                  onPressed: (){
                    setState(() {
                      var height_value = double.parse(_heightController.text.trim());
                      var weight_value = double.parse(_weightController.text.trim());
                      if(weight_value / (height_value*height_value) >= 25){
                        _obstate ='Obesity';
                      }else{
                        _obstate = 'Normal';
                      }
                    });
                  },
                ),
              ],
            ),
          ),
        )
    );
  }
}

'모바일앱개발_flutter' 카테고리의 다른 글
| 모앱팀플_android studio git 협업방법 (0) | 2022.11.13 |
|---|---|
| [모바일 앱개발] video 7 Using Keys, (0) | 2022.10.19 |
| [모바일앱개발] video 5 - Layout Part 2 (0) | 2022.10.18 |
| 모앱 video4 - Layout Part1 (2) | 2022.10.18 |
| video3 _ default code 변경해서 응용앱 만들기 (1) | 2022.10.14 |